Follow The Grief Toolbox ![]()
![]()
![]()
![]()
- |

New Attributes Tutorial
Some products may have different variations or attributes that you would like to offer (as an example, you may be selling something that comes in different colors or sizes).
To add an attribute to a product, you must be editing your product. You can find a list of your products in the right sidebar of the web site. Select the edit link next to the product you wish to edit.
Step 1
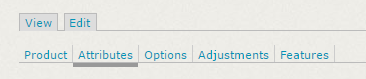
From the Edit page, click on the Attributes tab found at the top of the page (image below). If you are adding a new product, the Attributes tab will not be available until after you click Save and Continue on the initail product setup.
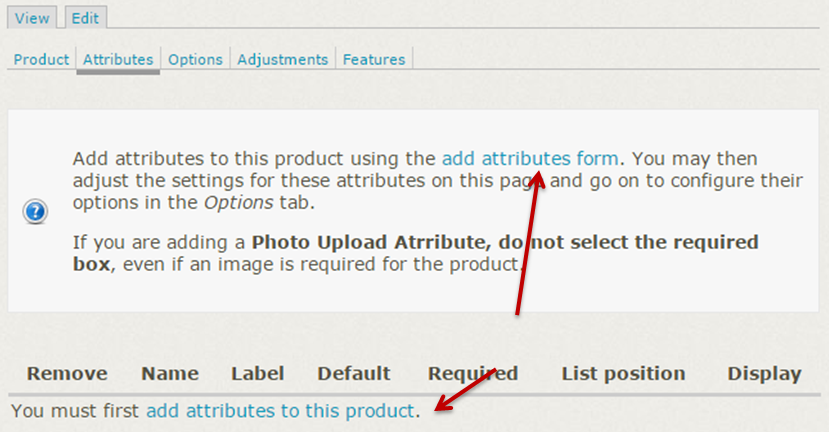
This will bring you to a page that lists all of your product's attributes. If you haven't added an attribute, the list will be empty.
Step 2
To add an attribute, click on the "add attributes form" link in the informational area of the page.
This step will apply to both adding an existing attirubute or creating a new one.
Here you will be able to see the available attributes and Adding Existing Attribute to your product (image below). All vendors on the marketplace share the same list of available attributes, and you can reuse them. If you don't find the attribute you are looking for, you will want to Create Custom Attributes & Options.
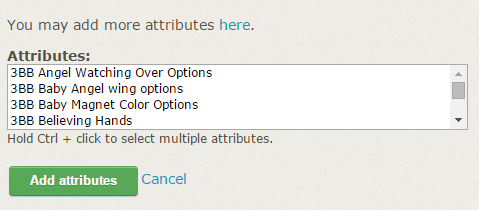
Adding Existing Attribute
Step 3a
Select the attribute (or multiple attributes, if you wish) and click the Add Attributes button.
Your attributes will be added to the Attributes list for your product. On this list, you will be able to adjust the Label that customers see when adding your product to their cart, toggle Required if the product cannot be added to the cart without selecting an option, or adjust what type of Display you want on the product page.
Step 4a
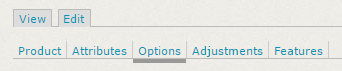
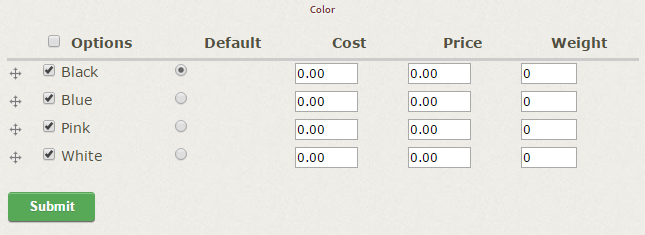
If the attribute has options (for example, the attribute "Colors" can have options of availble colors: red, green, blue, etc), you can edit these by clicking the Options button at the top of the page, to the right of Attributes:
You will be re-directed to a page where you can customize the display of this attribute (image below).
If there is an associated cost, price or weight increase with a particular option, you enter those modifiers here. If you have a list like the one displayed above, and decide you don't want to display Pink as a color, simply uncheck that option.
This list will allow you to adjust Option for every attirubute you have added to this product.
Click Submit when you are satified with the Options for your product, and then return to your product to view the updated Attributes.
Create Custom Attributes & Options
When you need to make your own "Custom Attributes" or add options to an attribute, you will start back at the Attributes page, found when editing the product.
Step 3b
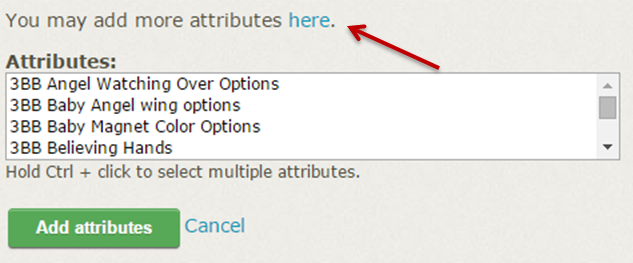
To add custom attributes to the site, click When you reach the Add Attributes Form, click on the link where it says "You may add more attributes here."
This will bring you to the Attributes Administration page, where you can see an overview of previously created attributes or add a new attribute.
Since this list is shared among all vendors, please don't delete or remove any of the attributes that are currently found on this page. If you can, please add options to a similar attribute before creating a whole new one.
Step 4b
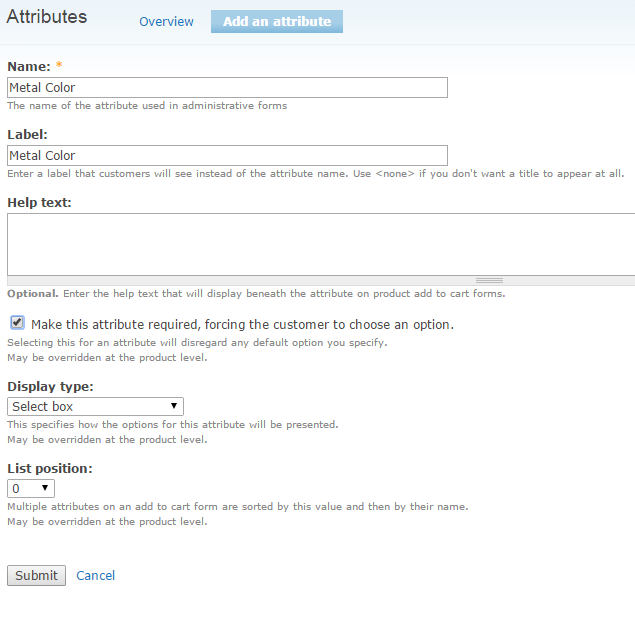
Let's add a new attribute by clicking the Add an Attribute link highlighted below:

This is where we add the Attribute and set the default settings. Since we want this to be a select box, we'll select that as our Display Type:
Click the Submit button once you've filled out the form. This will bring you back to the list of attributes, and the attribute we just created is added to the list. Next, let's add some options to the dropdown.
Step 5b
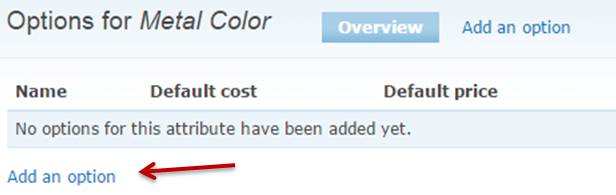
The last step is to configure some options on this new Attribute. Locate your Attribute on the list. Click on the Options link at the end of the row for your attribute:

Since we haven't added any options yet, we'll see an empty list. Click the Add an option link:
This will bring us to the form for adding the new attribute Options. All that is required on this page is the Name of the option, however if cost adjusts with the option, this is where you would adjust the price. These are default settings, and can be changed when implimenting the attribute on your product later.
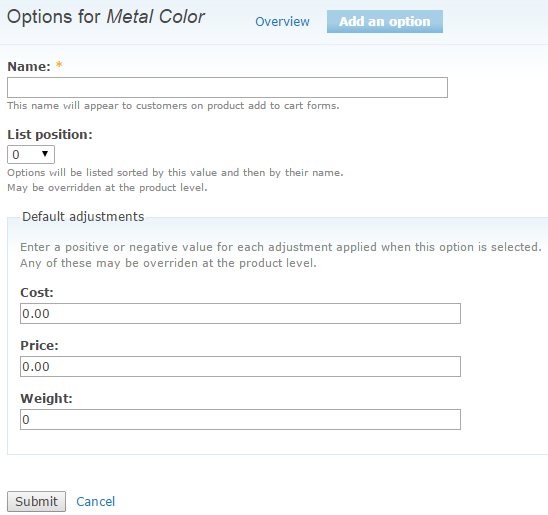
Click the Submit button to save your changes. The page will reload blank to allow you to add more options quickly.
Once you're done adding options, the Attribute settings are already saved, and you are all set to exit the Attribute Administration by clicking the Home button.
Locate your product again in the menu. You can now add the new attribute starting at Step 3a.
If you are struggling with adding attributes, contact us at [email protected]